Tuesday, 3 February 2009

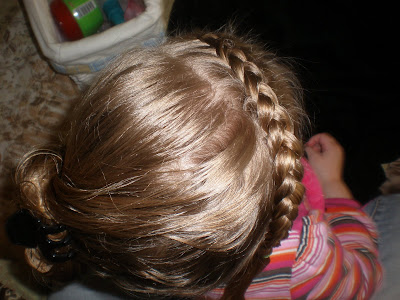
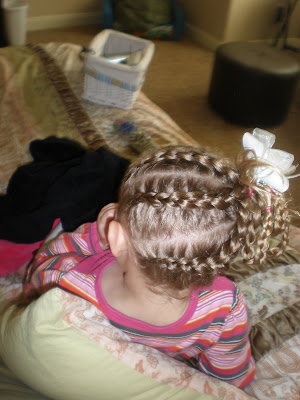
tucked under buns

I've had a few people ask for me to show a video doing the messy buns or other things. If you look to the right at the list "labels" & click on tutorials, it will show you all of the videos I have done so far, which has the messy buns on it. 

So for today - here's what we came up with: 
The part is a little different from what I normally would do. Instead of a zig-zag part, make it look like boxes. Pull into pigtails. 
Tuck under the pigtails, going the opposite way that you normally would, so the hair sits on top of the knot. 
Then start pinning the pigtails under so you don't see any of the ends. 
Spread the hair with your fingers & spray to hold. 

Thursday, 29 January 2009

Low Pony

I parted the hair down the middle. This doesn't have to be perfect - just kind of loose looking. I twisted one half of the pony tail.
Twist the other half, also. 
Bring them together in a pony tail with an elastic. 
Grab a piece from the pony & wrap it around the elastic so you can't see the elastic. 
I use a clear elastic at the very bottom of the wrap to hold it in. It works great & you can pull the hair down over the clear elastic to cover it up. 
You can curl the pony or just leave it as is. 

Thursday, 22 January 2009

another INSIDE-OUT frenchbraid

Part the hair from one side down to the ear. Inside-Out frenchbraid this section. 
Section the next piece going the opposite direction & also Inside-Out french braid this. 
Pull the hair into pigtails, adding the french braids into the ponies. 
Braid the piggies. 
Pull them together at the end with an elastic. 
Add some bows where the elastics are for where the pigtails start. 
& you are finished!!

Tuesday, 20 January 2009

Lots of Braids

I've had a lot of requests to do a tutorial on the inside-out french braid - so be looking for it especially since this one has lots of braids in it. 

I think the inside-out french braid is much easier than a regular french braid & looks much cuter. Here's what we came up with today:
Part the hair & begin braiding from the side.  This picture doesn't it show it very good but I didn't braid all the way down. On the right side, the underneath is down so that it can be pulled into a pony. 
I did four sections. I've done this before & I did 5 sections - so however many you need. You can see better in this the hair that is left down on the right side. 
Pull it all up into a side pony. 
Braid the hair - I did this once again in 4 sections - but however you would like. 
Front view: of course with a finger near the mouth. Add your cute bow. 
back view:

Thursday, 15 January 2009

a side pony

I'm on a really easy hairdo thing this week. Hope you guys think it's easy enough & like it:
Start by sectioning the hair starting at the bottom & adding your elastic. 
Section the next part & cross the lower piggie into it. 
make it all the way to the top, ending at a side pony. 
I curled the pony & added a bow. 

Tuesday, 13 January 2009

Loose, Messy Piggies

So here's another EASY hair do today. This can be done with either short or long hair. 
I started by pulling the front back in a triangle shape. Add your elastic. 
Put the rest into piggies. I defused it just a little bit to give it more volume but it can be straight too. 
Just bunch the hair up, as shown, and add your elastic. Leave some of the hair underneath hanging so it looks loose. 
Add a bow - I added it to the first elastic instead of the 2 piggies just to change things up. 
Use your fingers to spread the bun out more. Spray to hold. That's all it is. Really simple. 

Thursday, 8 January 2009

Pigtails, curled

I know this is really simple today but it's something everybody should be able to do. Don't mind the mess in the background. It was wash day so my sheets are in the wash. 
Throw the hair up into piggies. I did a zig-zag part just to add a little more to it. These curls are SUPER easy & work for everything. This is actually how I did her hair for our family pictures. I'll have to post a picture. 

Anyway - start by adding some type of polmade or curling gel after it is dry. I use Garnier Fructis curling gel or reshapable putty - they both work well. Then I clamp the hair down closer to the base of the head. 
Then wrap the rest around the barrel. Hold for about 25-30 seconds. Don't worry if the hair twists while you wrap it. It looks just as cute. 
These don't look as curly because I did thicker strands to make it go quicker. But I sprayed it with hairspray then ran my fingers through it. You don't have to run your fingers through - it gives it a curlier look.  It holds pretty well all day long. 
Then add your bows. All of my front view pictures are pretty blury - so this is what you get!!