Wednesday, 25 June 2008

Cute Short Bob

I watched my neice today & she jumped in the bath with my kids. But I was excited because that meant I got to do another little girl's hair:)
First, I parted her hair on an angle, instead of straight, just to add a little more to a bob. Then I round brushed her hair in 3 different sections: the bottom, middle & top. I used my biggest roundbrush, which I think is the biggest size you can buy. I blow dryed the base as much as I could, to give it more volume. But don't round the sides as much as you would the back. Add a cute little clip to keep her bangs back & there you go!!


I'm gonna call these tuck-under knots...

So - I'm just gonna try my best, with one hand to show how to do these. I'm not sure what to call them, so we'll just pretend and call them tuck-under knots. You can do SO much with these. You could even do this on short hair put them into just half way up pigtails or just leave all the hair down.
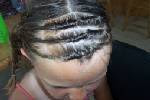
Start by sectioning off the hair that you want to do the tuck-under knot on. I find the smaller the section, the better.
I get the end of my comb & divide it right down the middle of the section. By doing this, you won't be pulling lots of little strands on the way, or hurting her little head.
Now, just tuck the piece of hair under, where you divided the hair in half.
Pull the hair completely through, and this is what it looks like!! Super easy, right?
Now, pull the hair tight, so this is the finished product!!
Do the exact same thing to add another tuck under knot
This looks like the top, but it's the bottom. Do the exact same thing as the top, but pull them through the OPPOSITE way, so it looks like the are supposed to be going up
Put the remainder of the hair into pigtails. You could either leave them straight, pull just half way, or do the messy bun. I zigzagged the part, but you could also do it straight.
To do a messy bun look, after you have pulled the hair just half way through, scrunch up the ponytail & put a rubberband to hold it in place. Spray the bun a little so it will hold better & you may have to pull on some pieces to make it look more symmetrical.
And there you have it. You could even do the twist under knots all the way down, in a straight row, instead of splitting them. That looks really cute too.

Monday, 23 June 2008

Remember Fish Braids?

Do you remember fish braids? I used to love them. But they really do take forever to do, with all the small pieces you add to it. So I did it this way - so it is much quicker.
Start by making your pigtails. Then divide one side of the pigtail in half.

From the right side of the half, grab a small piece. Grab it from the very back of that half. This is where you will always grab your pieces from. You'll see as you go, that if you do not, then you'll have a big chunk you'll need to bring forward & you want small pieces.

Take that small piece and take it over to the left side.
Now, grab a small piece from the left side (same way - back, top)

& take it over to the right side. Do this all the way down. You are fish braiding!!
Stop wherever you would like to and put a rubberband to hold it.
Go down aways & add another rubberband, so there is no braid in this area. Then start the fish braid over again.
Go all the way down until you reach the ends of the hair. Do both sides the same.


3 Braids


I thought this was pretty explanatory just by looking at it, so I didn't do it step by step. Just divide the hair into 3 sections, french braid each one & then bring them all together in the middle.


Barely pull any of the hair through & what is left hanging straight, wrap around the rubberband. I spray it as I am wrapping it & then secure it at the base with a clear rubberband.
Posted by Picasa

Monday, 16 June 2008

Yay!! Side ponies are in!!


I'm so excited!! My sister, Tami, sent this to me. Someone actually tried something from this blog!! It turned out darling!! She's only sixteen months and look at all that hair. It looks darling how she did 2 rows of it, instead of just 1! If any of you try anything - please email them to me so I can post yours too!! I love to see how it turned out.