Friday, 2 July 2010

Just a blast from the past if you were looking for other holiday ideas. If you want directions on any - click on the link to the right under labels that is labeled 'holidays'


our firecracker
star

puffy braid star
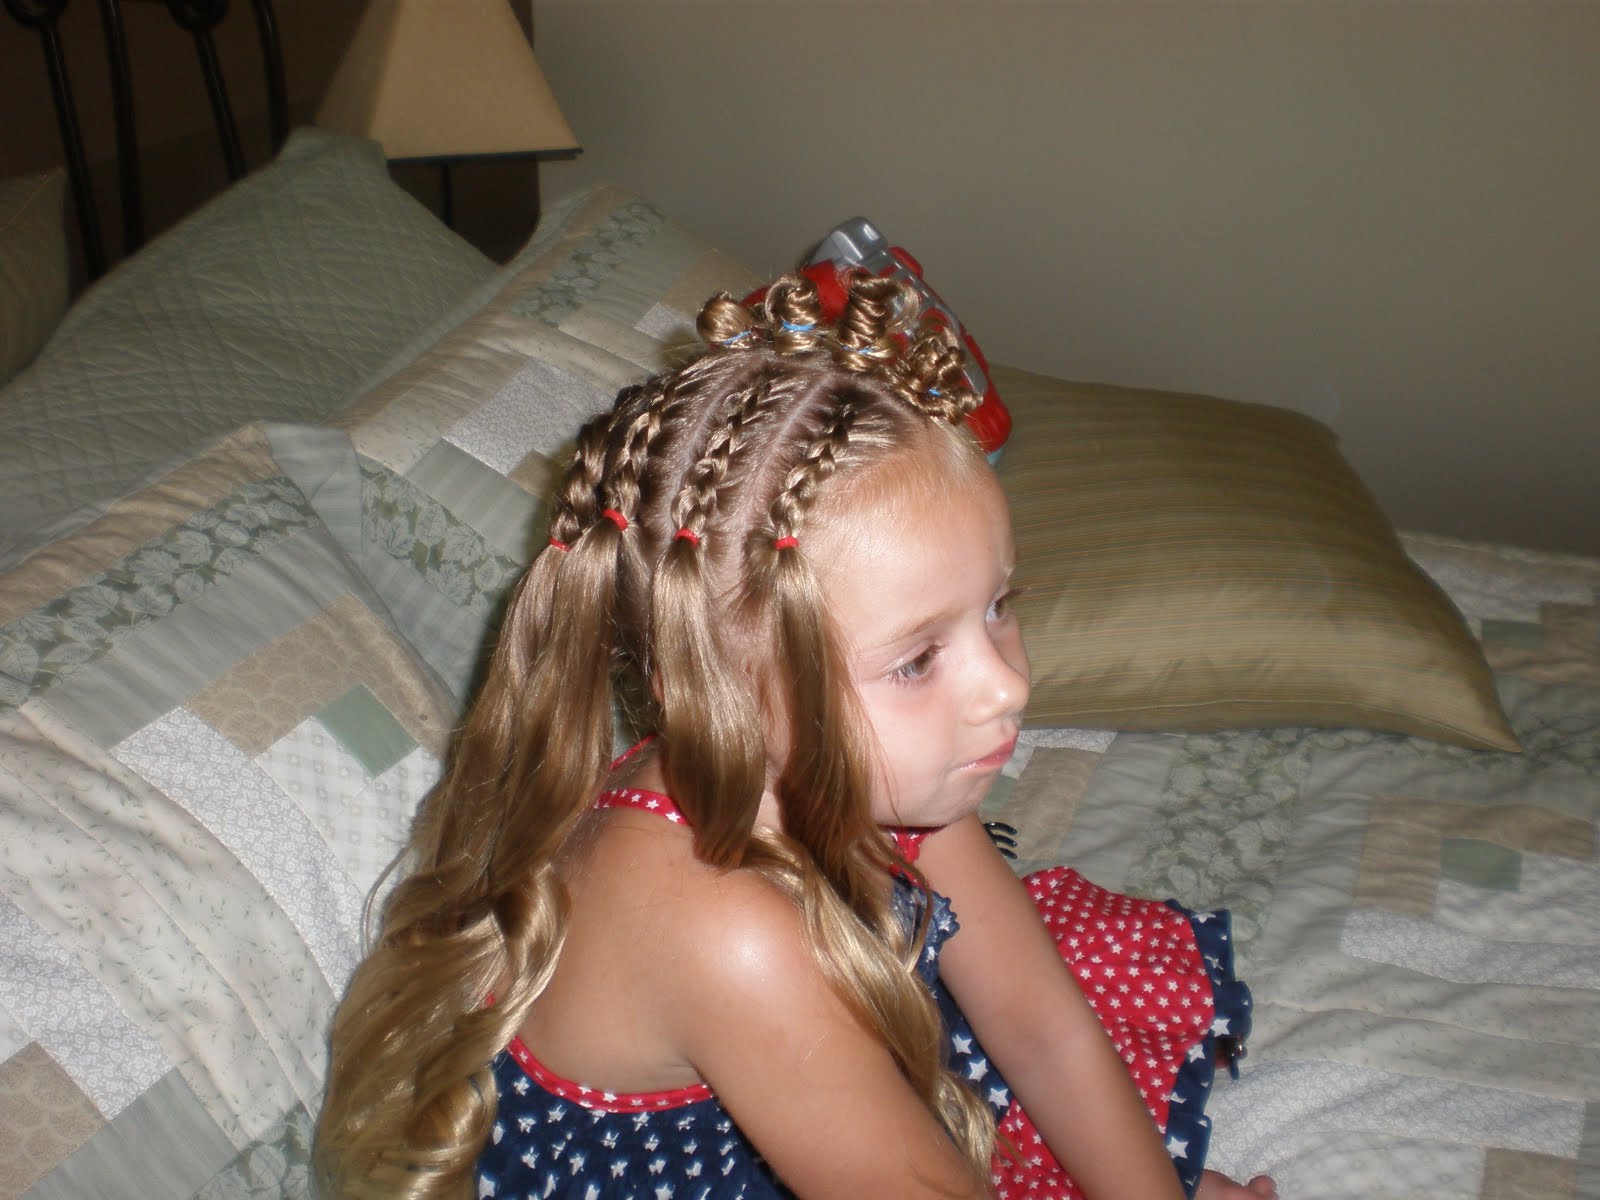
& of course another star - no instructions on this but we just had to do five points (super easy - easier than looks) & make a star like how you draw one. (really only 5 elastics in here!) & add ribbon by wrapping around after you have connected your star with a scrapbooking needle (sometimes you can thread a bobby pin too) Where the bow is - is where we ended & we're hiding the end pieces!

stars & stripes

I know I have totally neglected this blog but I have my reasons!! We enjoyed a 2 week vacation at Myrtle Beach. & since we've been home - we've been swimming everyday, either at swim lessons or at grandma's pool & we've just been keeping it perfect hair for swimming - 2 french braids. Stays out of her hair the whole time & is not tangly when we take it out. So my apologies but I do have a fun one for the FOURTH of JULY

This is our version of the American flag. Girlie thought I was literally going to do stars & stripes - nope just improvise!! She loved it & giggled when she looked in the mirror saying how fun it is! & brother kept giggling & saying her hair looked silly. Pretty funky but oh so fun!!

our version:the American Flag - see it? please say yes!
Part the hair down the middle & divide a square on the left side where the stars would go. The rest of the hair is going in the "stripes"
Start braiding for the stripes. I put the elastic closest to the hair. You could do this a few different way. You could braid all the way down. You could bring all this into a side pony or if you can't french braid - you can do puffy braids - using elastics instead.
I braided 6 braids!
Now to the "star" section. Divide little sections in the hair & add elastics. Do the entire squared section
Do mini buns for the stars. I was wishing the entire time that I had those miniature clips (in red preferrably) to secure each bun. It would have been darling & added to it & also taken less time. I just wrapped with an elastic to secure.
Here we go. The stars are all bunned up & the braids stripey!
I just curled what was left down but you could definitely pull it into a side pony, I even thought about twisting it down to a low side pony.
front view. I know it's funky but it's way cute in person.
& she decided she wanted to bow in with it & it looked darling. Love it.

Friday, 4 June 2010

braided rope

I had a duh moment with this. I had my camera sitting next to me & forgot to take pictures - so sorry about the no step by step instructions. You get the after effect.
I started by parting the hair off to the side (a little further than I normally would) then part back to the ear bo make like a box. Twist braid her hair until all hair is included. If you can't remember - you start at the top with 2 strands. You brush the rest of the hair forward (or whatever way you are grabbing the hair from) Start by twisting once & the next time you twist, you grab from the section that is pulled forward. Now, twist again & grab. Going all the way down. Once I got where there is no more hair to grab, I corkscrew twist to the bottom - going as far down as possible.
Add a side pony. Then wrap the twist around it, securing with an elastic & hide it as best you can.
top view
front view: this worked great with long hair but if you have a girlie with short, don't do a side pony, keep half of the hair down & try it.

Tuesday, 1 June 2010

slanted frenchbraid

If you know how to inside-out french braid, this is a must. So, so easy & just a little twist (or slant:) to make it not look like your traditional french braid.
Start the braid on either side of the head.
Begin inside-out french braiding down the head - making sure it stays on a slant. Pretty hard not to at this point.
Add elastic to secure braid.
Wrap hair around the base of the braid. I secured with an elastic & covered it as much as possible with hair. This seems to hold the best. I also spray it with hairspray as I wrap.
Curl the pony & add a cute bow.
top view
***For those of you who have asked what I put in her hair??? NOTHING!! Honestly. I do her hair when it is damp & only use a tail comb. Spray it with hair spray & use the comb again to smooth everything out. So I guess not nothing - only hairspray. Now - if I am keeping it down we use the Garnier Fructise Curling Gel whether I'm curling it or not. It's just a great scultping gel. I think everyone thinks you need to add all this product but the secret is do it while it's wet. It holds all day & we don't get many flyaways. Especially if I spray it & then comb back again.

Friday, 28 May 2010

yes, another side pony, our favorites

This is one of my favorite hairstyles for my girlie. It's super fast & you can change it up with the bun or braids.

Divide 3 sections & add elastics off to the side.
Braid the top & bottom ponies
Bring to the center to make one pony
I braided the pony. Then pulled the braid half way thru & half way thru again to make a braided bun without having to go around & around the pony (those never stay or look nearly as cute for me)

Add your bow & you are finished! Easy!!
side view

Monday, 24 May 2010

When I did my girlie's hair like this - we ran to Maverick to get a redbox. A scary looking & intimidating man approached me & says hi. her hair is so cute. Then walks away. It was too funny. So if this man thinks it's cute - I hope you all do too.
Start at the bottom of hair & part a small section. Make sure when you part it - you are at an angle & add your elastic to the center of that angle. All of the runners are at an angle
Repeat as far up as you would like to go - still angling each part.
I put just one elastic in the front to even things out in the front & back.
That's it!! Add a cute bow. We hadn't worn her hair in a straight pony forever & it was so quick & I loved seeing how long her hair looked with it.

Friday, 7 May 2010

I feel like I have a lot to smile about right now. Summer is almost here. My girlie will be out of school in 3 days so that's good news for you guys - we'll be able to post more:) Summer also means 2 weeks at the beach!! Can. not. wait.

Also - my man graduates college today. After going for 10 years, many degree & school changes he is officially done!! & to add to our exciting week - he won a drawing at work for a 7 day cruise to Mexico for the 2 of us!! Hooray!!

Since I'm in such a good mood this morning - I'll finally post this. It has been in my folders for a few weeks now. Like I said - once this girlie is out of school - hopefully be hanging around here more often.

If you can't french braid - or don't have time - cut the braid on top - but *warning* it adds so much to this & it's darling. This would be perfect for another short hairstyle. Anything with the runners going up is awesome for short hair because it keeps all those straggling baby hairs up.
Start by adding 3 elastics on each side at the bottom of the hair (yes I see Lola & Lota in the tv. charlie & lola is a favorite during hair time:)

Once you've got your 3 elastics on each side - start at the bottom & bring them together, in the middle. Take the next section to the middle but include the bottom with it - making your way up.
Here's what it should look like:
I did the braid with only ONE strand. Remember this? Super easy. You start a regular braid & only add to one side of the braid (right side in this case) so it flips the braid more on it's side.

With the french braid on top, divide the hair on bottom into 2 sections & throw those into 2 pigtails, like so
We finished with messy piggies because they are the fastest for us. But if you would like to take the time to curl or do something else - it would all be cute!
Front view: