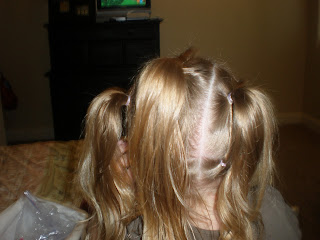
This did take a little bit longer because of the twist braids but I think it turned out cute. If you have 30 minutes to spare - do it!!
So start by parting the hair everywhere. I started at the top, just dividing it in half, but on the side part.
Make your way down, doing the next row.
Wednesday, 8 October 2008
Tuesday, 7 October 2008
Some cute moms I know through my family are starting a bow/flower blog. They are just starting it & only have flowers on the blog right now but will be getting more. Check it out though. Their prices are AWESOME!! & they're DARLING. When I don't make my own & buy them they cost me about $6 each flower or more...so check this blog out.
Also, they are doing a deal right now that if you add their link to your blog/website, they will give you 2 free flowers with your purchase. Sweet deal. So check it out!! (it's on my side or click on the link below)
www.bbsbuttonsandbows.blogspot.com

Also, they are doing a deal right now that if you add their link to your blog/website, they will give you 2 free flowers with your purchase. Sweet deal. So check it out!! (it's on my side or click on the link below)
www.bbsbuttonsandbows.blogspot.com
Inside-out French Braids today
If you don't know how to inside-outside french braid, do a normal french braid. & if you're not sure on how to do a normal french braid, you could easily just do normal braids starting at the top & bringing them together to the pigtails.
Part the hair down the middle. Secure one side with an elastic to stay out of the way. Part the first section that you are going to braid & secure the rest with an elastic.
Monday, 6 October 2008
another puffy braid variation
Here's another easy way to do puffy braids without having to do the normal puffy braids.
Part the hair in half. Add your 2 elastics on each side.
Now part a middle section. Split the 2 piggies up top in half & add them to your middle section & add your elastic. Then part sides remembering to include the pieces from the ponies above.
Part the hair down the middle again. Divide the pony in the middle in half & include it in each pony along with the side ponies.
It should look like 2 diamonds right in the middle. I just left the piggies down but you could do little buns.

Thursday, 2 October 2008
Tres Piggies
Divide the hair in 3 sections & add your elastics.
Mirror the same on the underneath part.
Next, I combed the pony so it was ready to go & held it in my left hand & with the other hand twisted each pony tail to add to the pony. Then add your elastic. (Remember to twist the top & the bottom pieces then add to your pony)
You should end up with 3 piggie tails.
Blow dry the piggies & flip them out with a curling iron. I just added some ribbon that I had in my stash.

Wednesday, 1 October 2008
Messy Bun Tutorial
Okay - I still have had a lot of questions about how I do the quick messy buns. My husband had today off so I thought it was a perfect time to do the video tutorial. Adde was really bugged we had to pause her show so it wasn't blasting in the back ground. She really isn't normally like this - but now you can my child does not sit perfectly still 100% for me either:) & I really don't like listening to myself on video (who does) so sorry!! Hope this helps out those who still are questioning it.
Tuesday, 30 September 2008
Down Today
I don't normally like her hair down without pulling the sides up & out of her face. But today was an exception. I thought if one side was up, it wouldn't be so bad with the other side down (she seems to be too little to understand that you can tuck your hair behind your ear)
I parted the hair on a slant, but part it however you want.
Do 3 twists back, securing them with bobby pins. I personally think the twists work better if the hair is a little damp.
Round brush the hair & add polmade so that the other side isn't constantly falling in her face & stringy. Spray to hold & add your cute flower.